
The information on this page corresponds to
Version 1.1
If you are using another version of Terra Antiqua, select it below.
Create Topo / Bathymetry
Terra Antiqua also offers the possibility to generate new geographic features when present day features can not be used (e.g. reconstructions of some mountains or basins that have disappeared).
This tool creates new topography or bathymetry in the DEM for the area defined by a polygon/mask prepared in a shapefile on QGIS.
The user can define several parameters that control the geometry and characteristics of the new features.
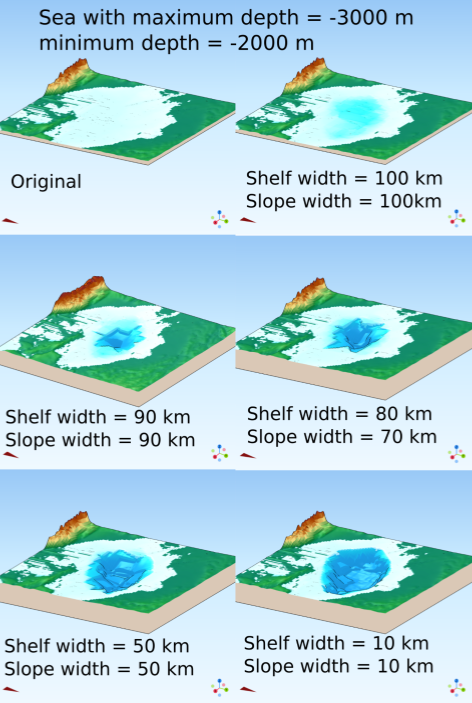
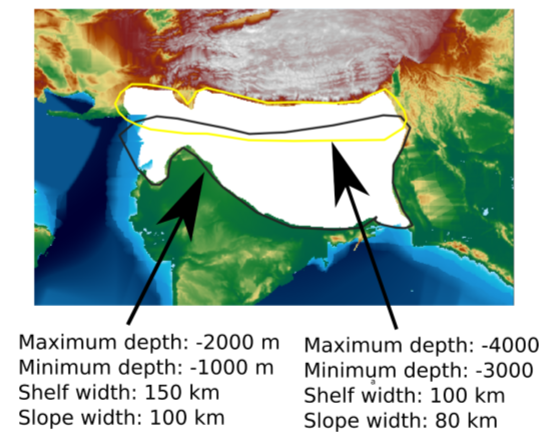
One can set the maximum depth, minimum depth, shelf depth, shelf width, and slope width to define the marine features. For mountain ranges , the parameters are the maximum height, the minimum height, the ruggedness, and the mountain slope width.
Based on these parameters the new feature is created as follows:
Create randomly positioned points within the polygon
Assign elevation values to these random points. The maximum depth (maximum elevation for mountains) is assigned to points that are furthest from the edge of the polygon and the minimum to pixels closest to the edge.
The slope/shelf width defines the elevation/depth gradient that will change the geometry of the feature. For example on mountains a narrow slope on a broad mountain range will generate a plateau-like feature. For marine basins, a shelf-like geometry is created by having another parameter defining the shelf maximum depth. A shallow slope on the shelf itself is formed followed by a sharp drop from the shelf to the deeper basin that quickly reaches maximum depth towards the center of the basin. Adjusting the shelf and slope widths also affects the deeper geometry of the basin as shown in the examples below.
Finally, the entire area of the feature is interpolated to create a continuous elevation/depth values pattern.
By default, all preexisting values will be erased before created the new feature. However, there is an option (see step 6 below) to take into account these values if they are higher than the mountain range created or lower than the sea created.
This allows you to create features that are connected to existing ocean basins or mountain ranges, in a way that looks more realistic.
This option adds an intermediate step between 1 and 2 above. The algorithm will check the pixel values beneath each of the randomly created points and, if they are higher than the elevation / lower than the depth to be assigned to the point, this will keep its original value.
Step by step
Link to the VIDEO illustrating these stepsLink to the VIDEO about the combined use of Modify Topo / Bathymetry and Create Topo / Bathymetry
-
Click on the icon
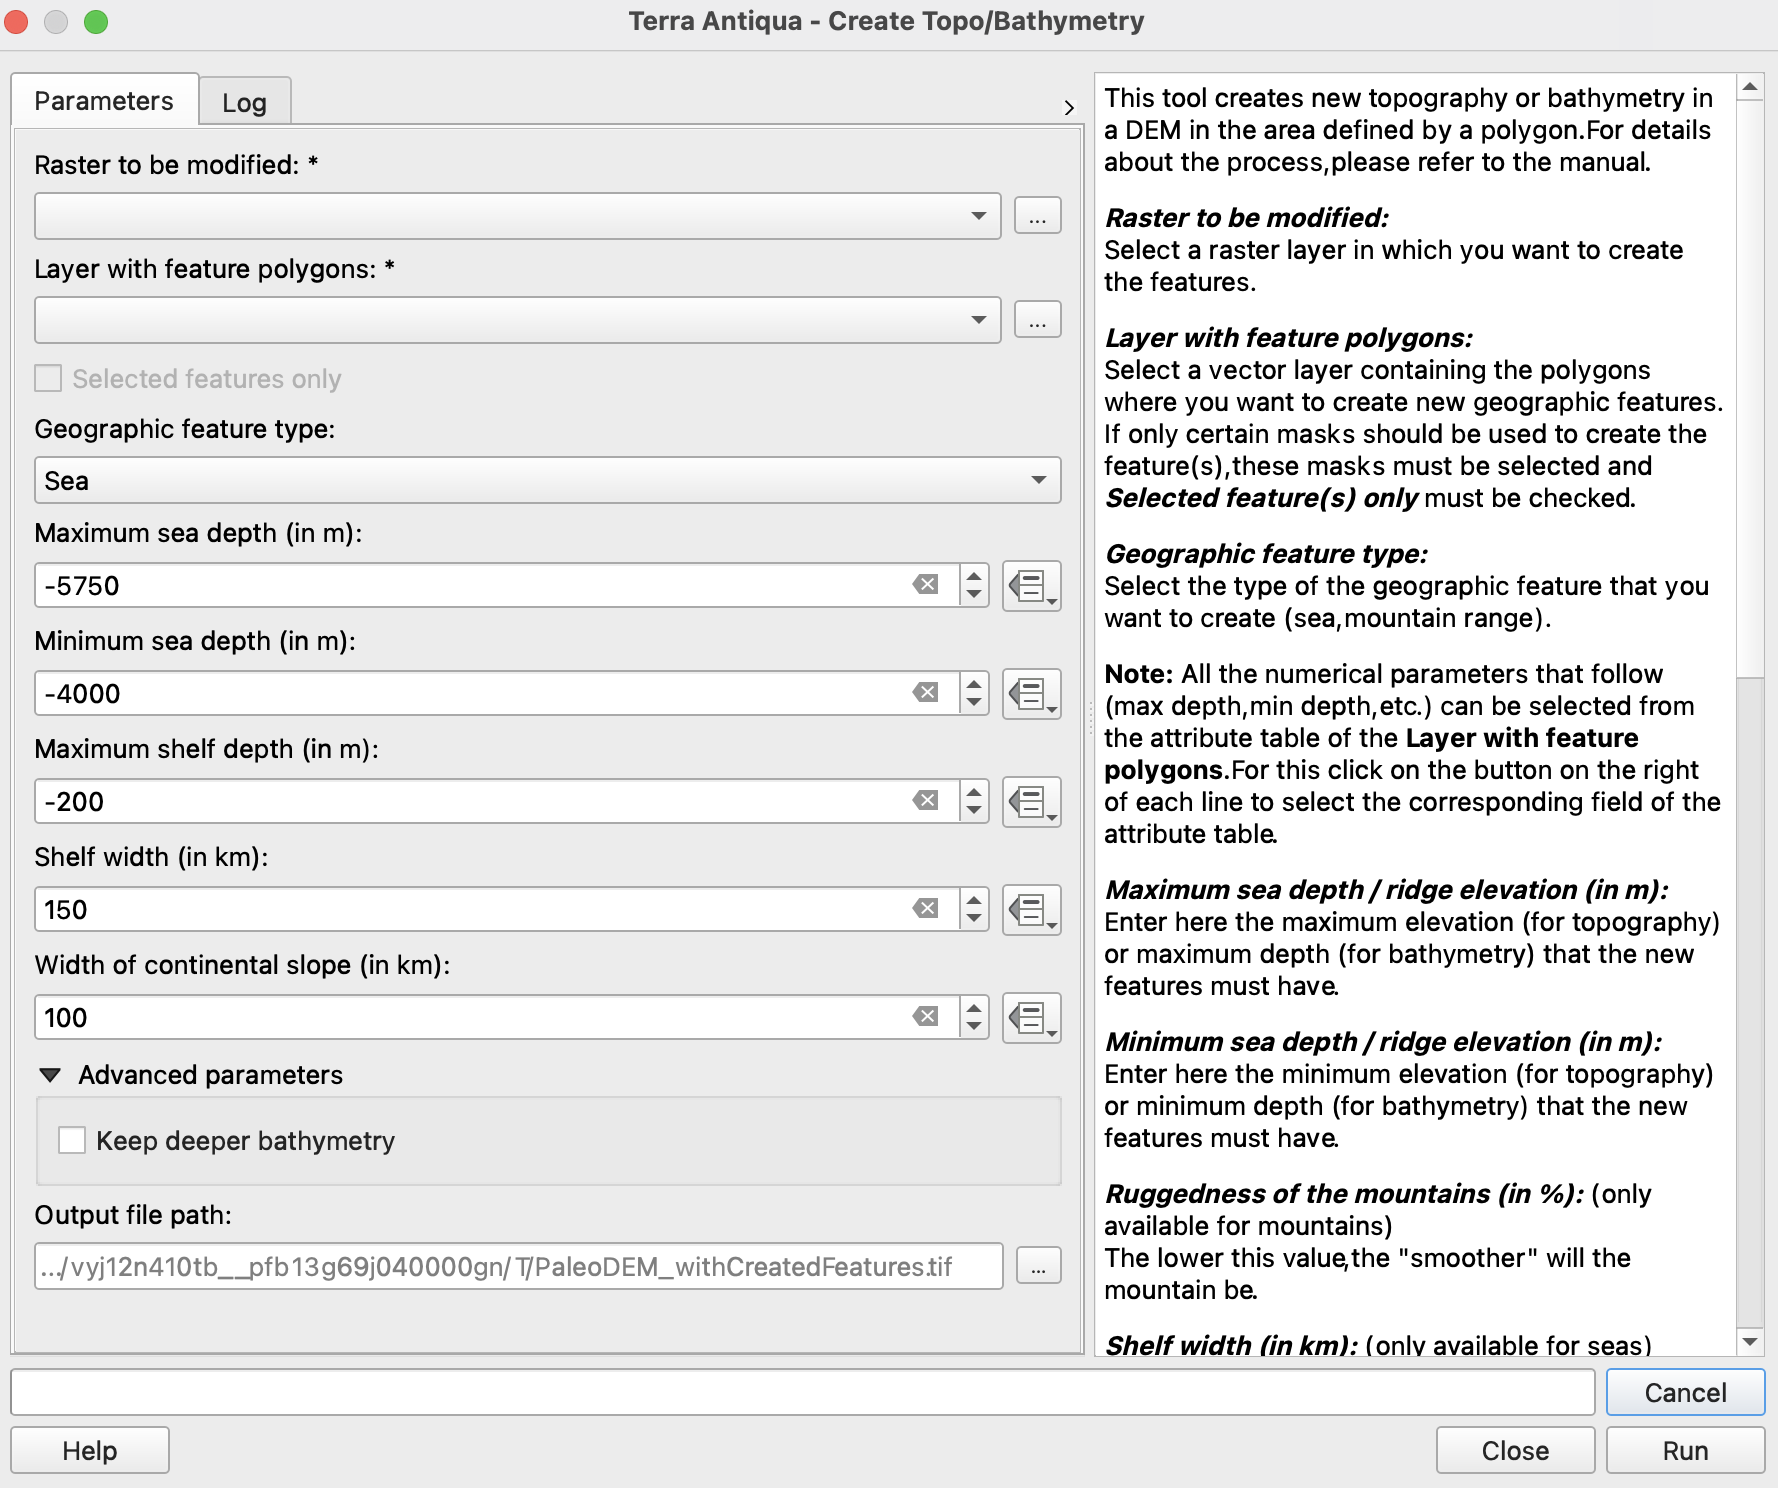
Choose the DEM where you want to create features.
Choose the shapefile containing the masks for the new features to be created. If you do not want to use all the polygons, check the box to use only the selected features. For this you need to select polygons on the QGIS map canvas.
Choose whether you want to create a sea or a mountain.
Enter the values for each parameter in the corresponding fields. Follow the instructions from the text on the right of the window. For each parameter you can either enter a value in the text box or retrieve it from the attribute table of the shapefile.
You may choose to keep or not the preexisting higher topography (for mountain ranges) or deeper bathymetry (for ocean basins). 

This is recommended if the features created are connected to existing mountains or oceans.
See explanation above.-
Choose the Output file path, and click Run.
Even if this tool works at any step of the reconstruction, it may be better to use it after modifying the topography and the bathymetry, in order to preserve as much as possible the complexity of the initial topography.
Create Topo/Bathymetry removes the original data to create a completely new artificially-generated topography that looks less realistic that real topography processed with the tool Modify Topo / Bathymetry![]() .
.
Note that the parameters are different for seas or mountains. Seas only accept negative values while positive and negative values are accepted for mountain generation.
To retrieve data (minimum elevation, maximum elevation, etc.) from the attribute table of the shapefile use this button 